Introduction
These past few weeks I have been trying to find the right workflow when analyzing data that are stored in remote servers. When sensitive data is stored on remote servers, working in the server is highly encouraged to ensure safety of information to external threats and data loss. In this case, no data should be stored in external devices.
Up until now I used RStudio Desktop for all my projects but running code locally when the data is in a remote server has proved to be a nightmare for me, as everything is just so slow.
Looking for alternatives, I learned about Emacs. Emacs is a powerful text editor that allows to bring code and data together on the server, while having some of the nice functionalities that RStudio offers. It has a very steep learning curve, so give it a try only if you do not have access to RStudio Server or if you are feeling adventurous.
I documented the painful journey of getting Emacs up and running for my data analysis projects and turned it into a blog post. Let’s start hacking.
Installation
First install Emacs on your local computer. In Ubuntu you can install the latest version by putting the following command in the Terminal:
sudo apt-get install emacsSpacemacs
Once Emacs is installed, I recommend installing Spacemacs on top of it. Spacemacs provides a layer of functionalities that make setting up and working with Emacs much more pleasant.
You can install it by removing the .emacs.d folder that is in your home directory and typing:
git clone https://github.com/syl20bnr/spacemacs ~/.emacs.dNow launch Emacs in your computer, accept the default initial options and go through the ‘Evil Tutor’ tutorial by typing SPC h T v.
The dot file
Emacs can be configured by editing Elisp code in one of its files. This file is usually known as the dot file. Spacemacs provides a good starting template with nice defaults and informative comments. You can find the dot file typing SPC f e d. Spend some time trying to understand this file and try out different options. It is also a good idea to look at other user’s configuration.
An important aspect of Spacemacs is the concept of a layer. Layers help collect related packages together to provide features. You can add/remove layers by including/removing them from the dotspacemacs-configuration-layer in your dot file. Read the documentation for more details.
ESS
An important package/layer for us statisticians is ESS (Emacs Speaks Statistics). This layer adds support for statistical programming languages to Spacemacs.
Add the layer ess to your dot file and restart Spacemacs.
Start an R process typing :R. You will see the usual R command line where you can write R commands as you would do in RStudio or the terminal.
Create an R script file by typing SPC f f and then typing the path to the new file you want to create. Make sure the file name ends with .R. This will open a new buffer which ESS will recognize as R code. Write some simple commands in this script and press C-RET to run a single line. You can run entire regions or paragraphs by typing M-C-x or, in normal mode, SPC m e.
ESS process on remote computers
ESS works with processes on remote computers as easily as with processes on the local machine. The recommended way to access a statistical program on a remote computer is to start it with TRAMP.
You will need to have R installed on the remote computer in order to start a remote R process. In my experience, installing from source will produce all sort of dependency issues, specially for viewing graphics. I recommend installing R with a package manager instead. I use Miniconda.
You may also need to specify which remote remote directory paths TRAMP can search for remote programs. Add the following lines to the dotspacemacs/user-config section of your Dot file:
(with-eval-after-load 'tramp
  (add-to-list 'tramp-remote-path 'tramp-own-remote-path))
Once you have added the remote path you should be able to run an R process on the remote machine. The R program that will run will be the same as running R on the remote terminal. Check that the correct path that contains the R program you want to use comes first in the $PATH environment variable in the remote machine.
Start an ssh session using TRAMP with SPC f f /ssh:user@host: and enter your password. Press Enter (RET) to start a dired buffer in your remote home directory. Now you can start editing scripts and running R processes on the remote machine as you would usually do on your local machine. Once you have finished working on the server you can close the connection with :tramp-cleanup-connection RET
To simplify the process even further create a config file in your .ssh/ folder and add an account. It would look something like this:
Host server1
  Hostname host
  User user
  ForwardX11 yes
With this configuration /ssh:server1: is enough to start a connection. The ForwardX11 is needed if you want to see the R graphic device showing on the current machine. See next section for more details on showing R plots generated from the remote machine.
Graphics
If you have installed R in the remote machine with Miniconda or other package manager you should be able to properly see any R plots generated on the remote machine. If X11 forwarding is enabled you should be able to see any R plots generated on the remote machine. We want to use the Cairo graphics library to properly show the plots. If you have installed R with Miniconda you should have Cairo already installed. If you installed from source you will need to install Cairo from source, with all the implied dependency issues this entails.
We can set some default options when showing R graphics. Create a file named .Rprofile in your remote home folder and add these lines:
## Graphics options
## Open a new dbcairo device in the bottom right.
## This avoids having to move/resize the plot window for each session.
setHook(
  packageEvent("grDevices", "onLoad"),
  function(...) {
    grDevices::X11.options(
                 type = "dbcairo",
                 xpos = -1, ypos = -1
               )
  }
)
If you have a multiple screen setup you may have to play around with the xpos, ypos arguments to show the window where you want. Or properly set the DISPLAY environment variable.
CRAN mirror
Add the following lines to your .Rprofile to avoid having to interactively select the CRAN mirror in each R session:
local({
  r <- getOption("repos")
  r["CRAN"] <- "https://cloud.r-project.org"
  options(repos = r)
})
Rmarkdown
It is possible to work with Rmarkdown files within Spacemacs thanks to the polymode package. Miles McBain configuration provides some private layers with some helpful features for this purpose. These layers are enabled by moving them to private folder and adding the polymode layer at dotspacemacs-configuration-layers in your dot file. Note that Spacemacs will use the private ess layer instead of the official one.
You should enable the markdown layer by adding the following lines at dotspacemacs-configuration-layers:
(markdown :variables
          markdown-command "pandoc")
You may also want to add the following lines to your dotspacemacs/user-config section:
(add-to-list 'auto-mode-alist '("\\.md" . poly-markdown-mode))
(add-to-list 'auto-mode-alist '("\\.Rmd" . poly-markdown+r-mode))
You can now write and render Rmarkdown documents (.Rmd) as you would in RStudio.
x <- rnorm(100)
y <- rnorm(100, x)
plot(x, y, pch = 19)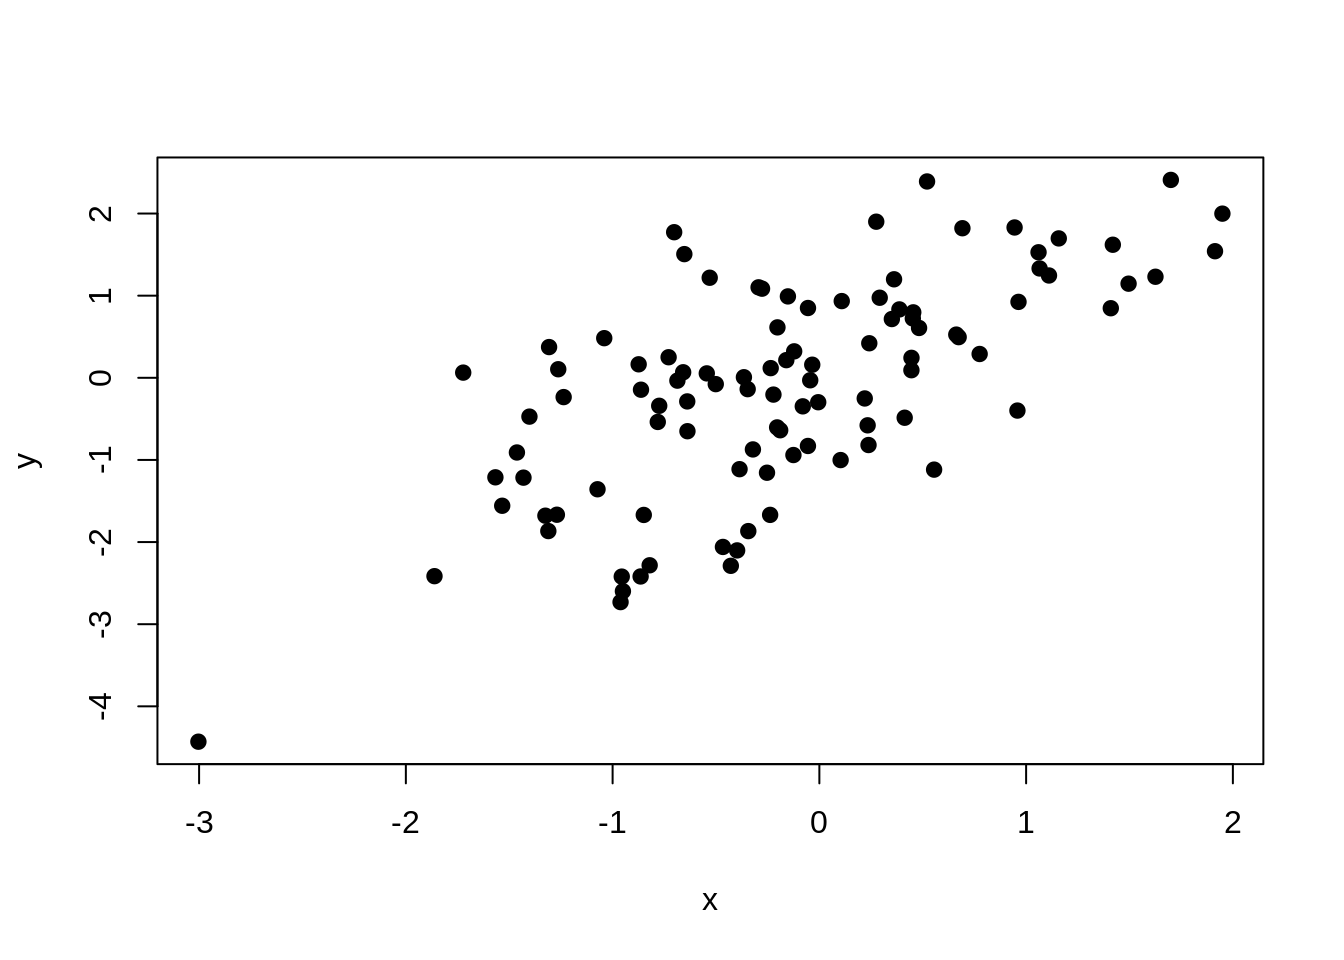
Useful commands
normal-mode
| Key Binding | Description |
|---|---|
SPC f f |
Find/create file |
SPC f s |
Save file |
SPC f e d |
Open dot file |
SPC 1 |
Select window 1 |
SPC 2 |
Select window 2 |
SPC w / |
Split current window vertically |
SPC w - |
Split current window horizontally |
SPC b b |
List buffers |
ESS[R]
| Key Binding | Description |
|---|---|
C-RET |
Evaluate current line |
C-M-x |
Evaluate current paragraph |
SPC m e |
Evaluate current paragraph |
SPC m f |
Evalueate current function |
C-' |
Insert assign symbol <- |
C-" |
Insert pipe symbol %>% |
poly-markdown+r-mode:
| Key Binding | Description |
|---|---|
C-c i |
Insert R code chunk |
M-n e |
Knit document |